Review: AirenSoft OvenMediaEngine
This review will highlight OvenMediaEngine, the open-source streaming server from AirenSoft, and explore its features for providing sub-second latency for live streaming. The article will also touch on OvenMediaEngine’s options for LL-HLS and WebRTC. Finally, we’ll dive into testing SRT and RTMP ingest options.
About OvenMediaEngine (Enterprise Edition)
OvenMediaEngine is a fully featured open source streaming server that can provide HD live streams over WebRTC and LL-HLS with sub-second latency. It is capable of ingesting live streams over the following protocols: WHIP, SRT, RTMP, RTSP, and MPEG-2-TS. Additionally, users can encode to adaptive bitrates (ABRs) with the embedded live transcoder and stream to viewers over LL-HLS and WebRTC.
Setting Up OvenMediaEngine
There are two ways to access and run Oven MediaEngine: You can download the Oven MediaEngine source code and build it yourself, or you can install it with Docker.
I used the OME Docker Launcher to set up OvenMediaEngine for this review. To do this, you’ll need to be comfortable with Bash scripting via the command-line interface and starting EC2 instances with Amazon Web Services (AWS). You’ll also need a basic understanding of using AWS. For those who are not familiar with Docker, OME Docker Launcher makes things a breeze, because AirenSoft provides all of the commands you’ll need to run in the commandline interface.
To get started with using Oven MediaEngine, first you need to subscribe to EC2. Then, you can launch an instance for Oven MediaEngine on AWS. The follow ing steps will guide you through the setup process using the OME Docker Launcher.
First, click Launch Instance, and give your instance a name. As you can see in Figure 1, I named mine OMETEST. Then, choose an Amazon Linux AMI. For my testing in this review, I used Amazon Linux 2023. For instance type, you can use a T2.micro just for testing purposes. Next, set up a key pair to use, and configure the network settings for your security group.

Figure 1. Setting up OvenMediaEngine
Table 1 shows the ports used by OvenMedia Engine. These are ports I opened on my EC2 instance in the security group. You’ll need to have these ports open on the server.

Table 1. OvenMediaEngine ports
Installing Docker and OvenMediaEngine
Here are the steps to install OvenMedia Engine:
- Connect to your EC2 instance using SSH
- Once connected over SSH, install Docker using the following:
$ sudo yum install docker -y
- Next, test Docker to confirm it installed properly using this statement:
$ sudo service docker start
- Then, to install OvenMediaEngine using the Docker Launcher, run the following command in your Linux shell:
curl -OL 'http://raw.githubusercontent.com/ AirenSoft/OvenMediaEngine/master/misc/ome_docker_launcher.sh' && chmod +x ome_docker_launcher.sh
- Run the following to display the Oven MediaEngine dashboard screen:
./ome_docker_launcher.sh -h
- Follow the instructions that appear on the dashboard screen and run this command:
sudo ./ome_docker_sh setup
Now, it’s time to start the streaming serv er. It should be ready now, and you can start OvenMediaEngine with the following command (be sure to include your IP address):
$ OME_HOST_IP=1.2.3.4./ome_docker_launcher.sh start
Figure 2 shows what you’ll see once Oven MediaEngine is up and running. As you can tell in the image, these are the ports used by OvenMediaEngine.

Figure 2. Detail about ports once OvenMediaEngine starts
To complete the rest of the setup and other advanced items for OvenMediaEngine using the OME Docker Launcher, go to the Getting Started with OME Docker Launcher video tutorial. It will also walk you through setting up a TSL certificate for use with OvenMediaEngine. You can find documentation for installation with Docker at go2sm.com/docker.
Sending Streams With OvenMediaEngine
Once OvenMediaEngine is installed and started, you can begin sending streams to the streaming server. To send an RTMP stream, you can use the common formatting for an RTMP stream for live encoding. What you need to keep in mind is that the default application for OvenMediaEngine is called “app.” Therefore, be sure to include this for any of your live encodes. Your stream name can be whatever you’d like.
In the example shown in Figure 3 using Open Broadcaster Software (OBS), rtmp is the protocol, and 1935 is the port used. Both are in cluded in the server field. The default application name is app, and that is included as well. Lastly, the stream name I chose is sample, but you can name yours whatever you’d like.

Figure 3. Sending streams
For testing playback, you have the option to use the secure TLS demo player (http://demo.ovenplayer.com) or non-secure, nonTLS demo player (http://demo.ovenplayer.com). I used the nonTLS player for my testing when writing this article and used the following formatting to access the player: http://my.ip.address:8090. The formatting for using LL-HLS and Web
RTC for playback is as follows:
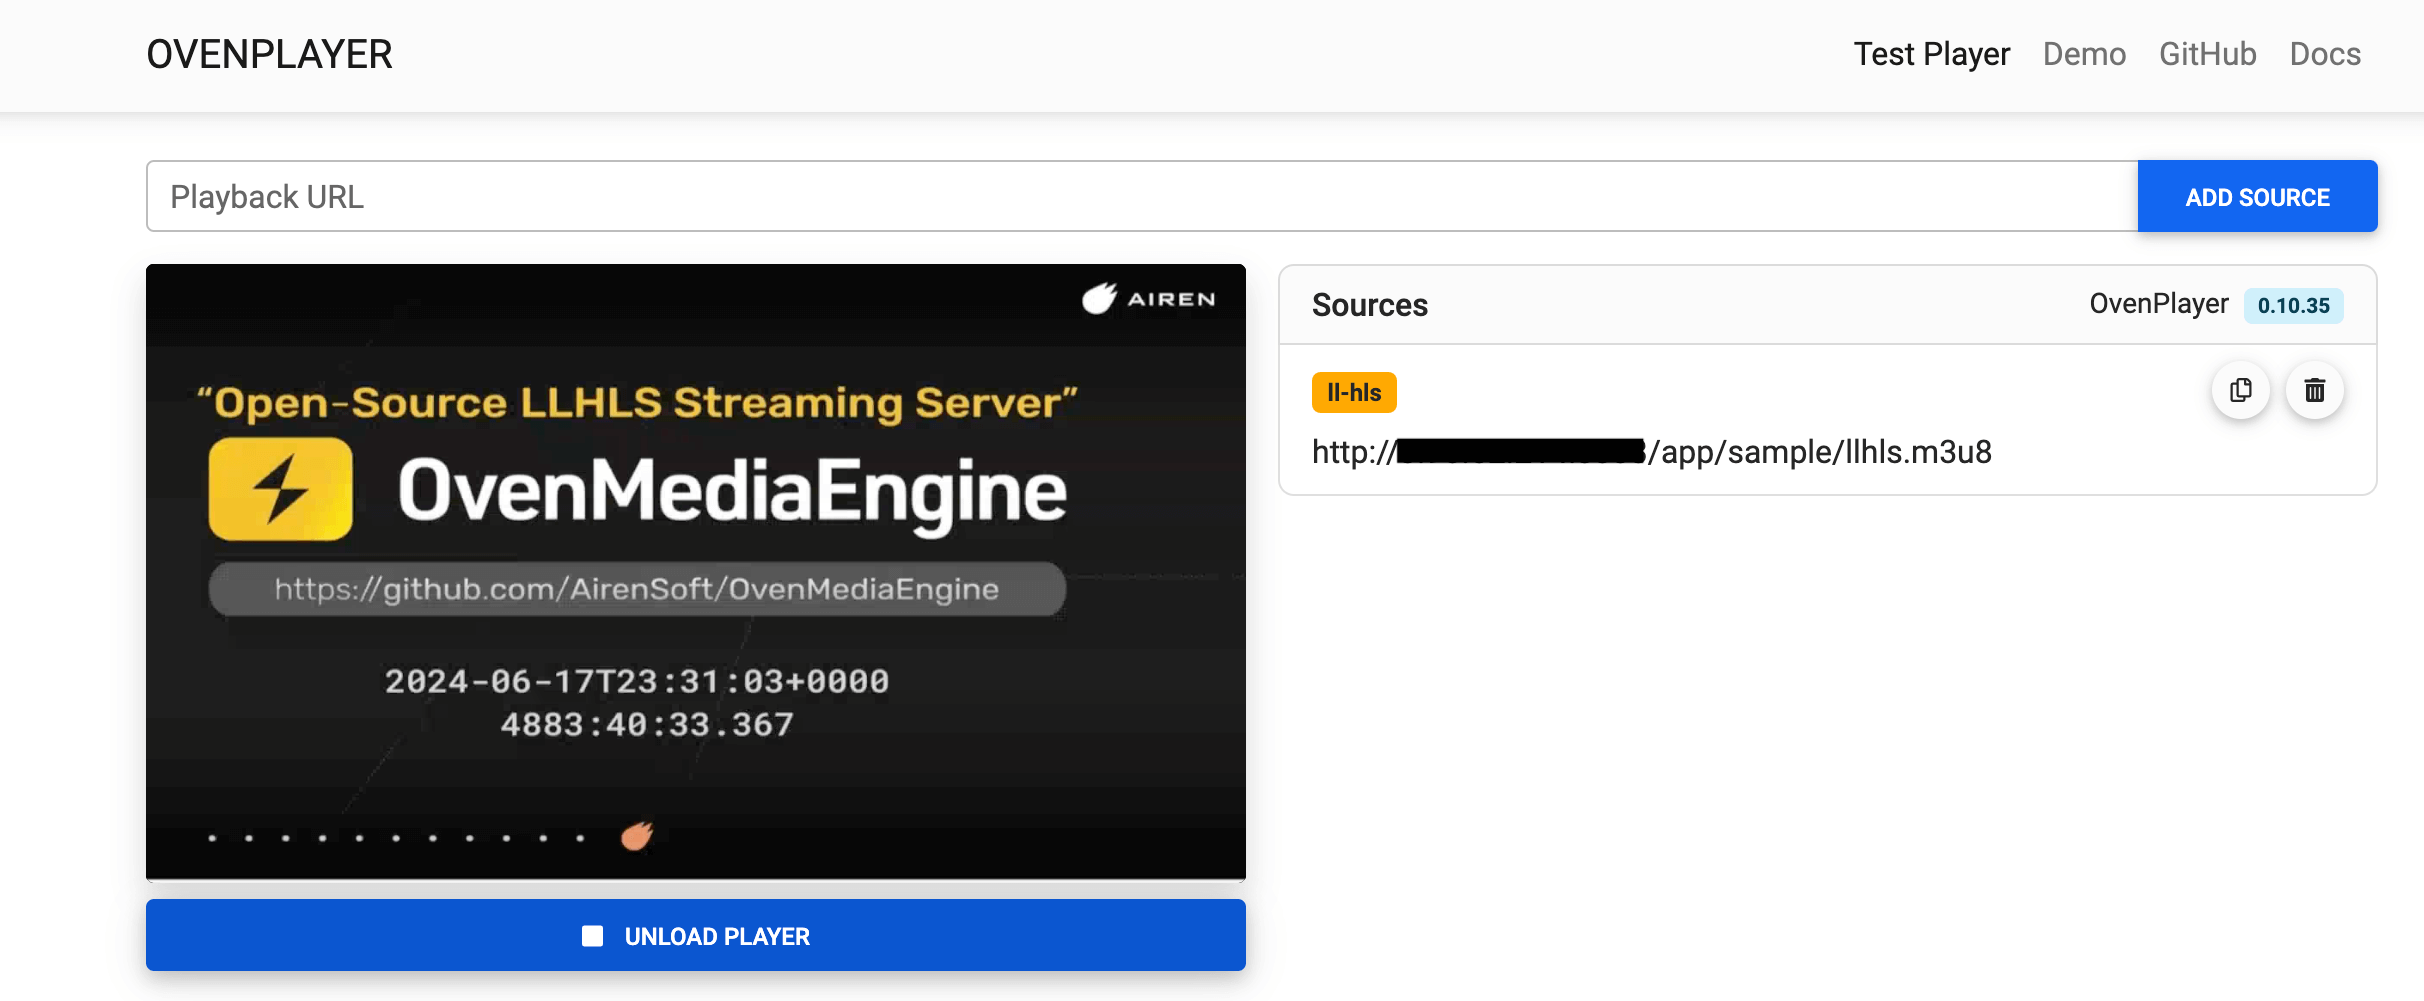
Figure 4 shows what OvenMediaPlayer looks like for testing playback.

Figure 4. A view of streaming playback
Testing OvenMediaEngine
Here’s how I tested OvenMediaEngine. First, I was interested in whether I would be able to set up and configure the streaming server using Docker. The free open-source version of OvenMediaEngine has more features, and in order to get that version working, I needed to use Docker.
Second, I wanted to see how well OvenMediaEngine worked with ingesting SRT and RTMP live encodes using Videon’s LiveEdge Max and OBS. Third, I wanted to learn if WebRTC and LL-HLS streaming playback would be straightforward for newbies. Lastly, I was interested in testing latency.
Streaming Server Setup
Setting up OvenMediaEngine using the OME Docker Launcher was fast and easy. Because AirenSoft provided setup with scripts and other commands, it was a straightforward process. In addition, using Docker was effortless since I’m very comfortable with Bash scripting and AWS
Testing Ingestion of Live Streams
Ingesting SRT and RTMP live encodes with OvenMediaEngine was also a straightforward process. The only tricky part was formatting the streamID so that it was percent encoded for SRT streams. Videon provided excellent guidance on how to format the streamID for LiveEdge Max and walked me through all of the elements to configure SRT setup with OvenMediaEngine using LiveEdge Max. After I ensured that my UDP port of 9999 was open on my EC2, the setup was simple from there. Videon’s assistance also guided me in configuring SRT streams using OBS.
Here’s what I tested for ingest:
- LiveEdge Max—RTMP ingest
- OBS—RTMP ingest
- LiveEdge Max—SRT ingest
- OBS—SRT ingest
Setting up RTMP ingest with OvenMedia Engine was not difficult. Figure 5 shows the main settings configured in LiveEdge Max.

Figure 5. RTMP settings in LiveEdge Max
Configuring SRT ingest took a little more work because the streamID was needed in both OBS and LiveEdge Max.
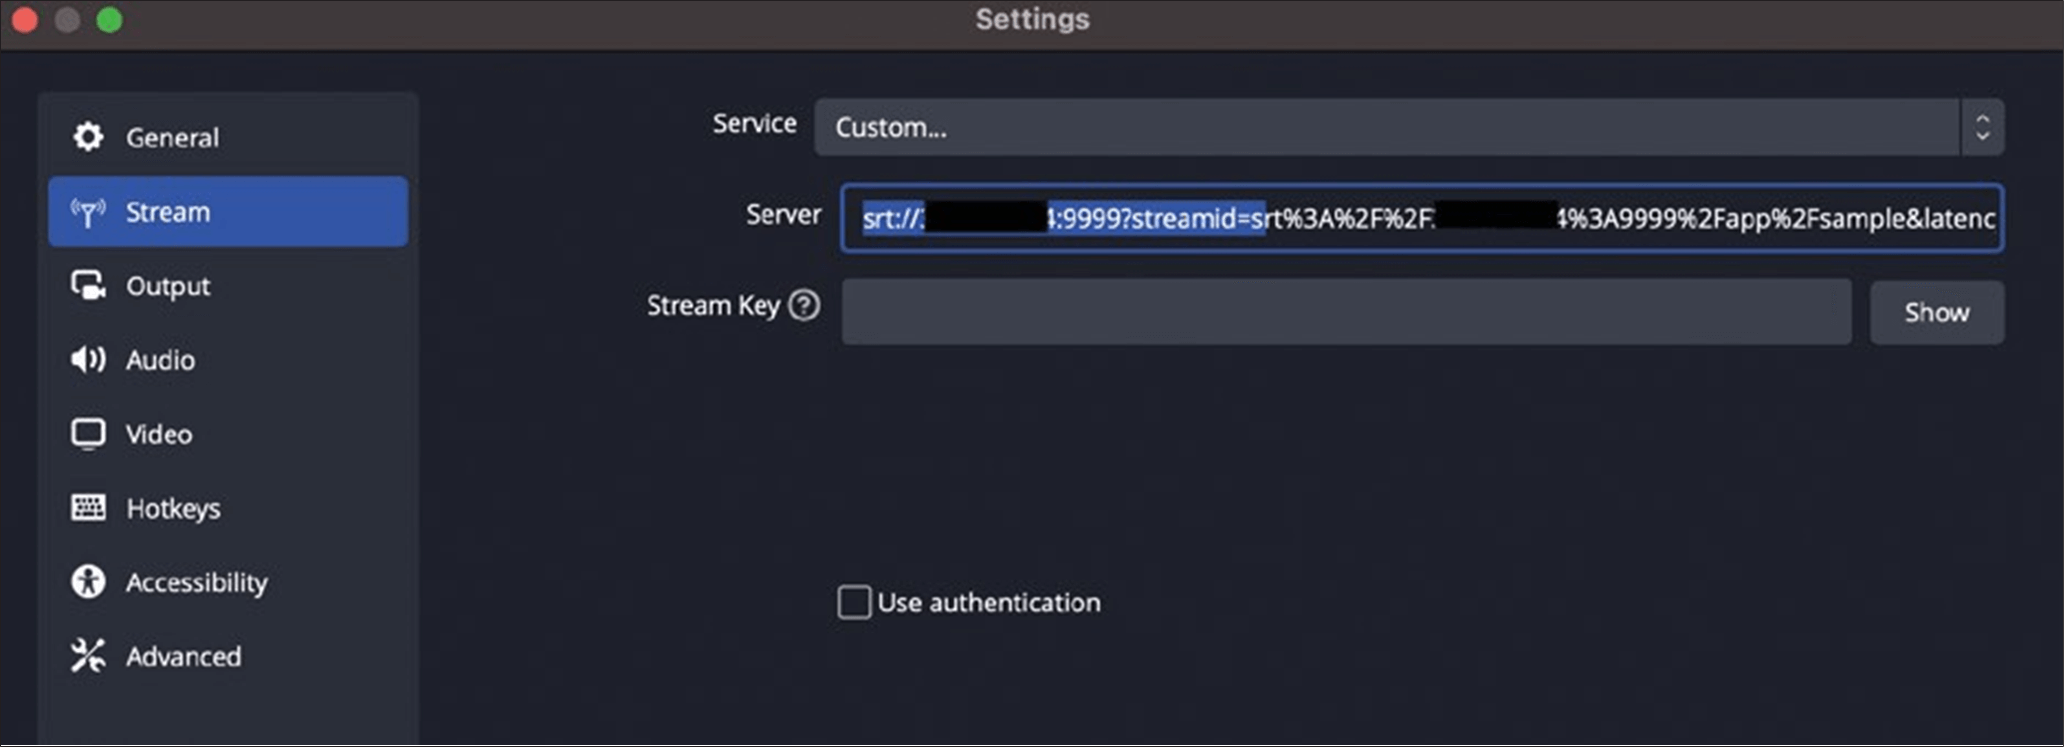
Figure 6 shows the formatting of the stream ID needed for OBS. Users just need to select Custom under Service and input their streamID.

Figure 6. StreamID added in OBS
Figure 7 shows the streamID formatting needed for LiveEdge Max.

Figure 7. StreamID added in LiveEdge Max
Users will have to create an SRT setting in Outputs and enter the following:
Call Mode: Caller
URL: srt://ipaddressofserver:9999
Stream ID: srt%3A%2F%2Fmyipaddress%3A9999%2Fapp%2Fsample
Overall, ingesting streams using SRT on OBS or LiveEdge Max worked great and without problems. My only issue was a user error by neglecting to open the UDP port for 9999 in my AWS security group.
Testing Streaming Playback
Streaming playback of WebRTC and LLHLS went well for me. I used the nonTLS player for testing, and this worked smoothly for playing both types of streams. I did not in stall a TLS certificate on OvenMedia Engine to test streams over TLS.
Latency Testing
For latency testing, I tested both LiveEdge Max and OBS using most of the default settings in the presets for each. Figures 8 and 9 show what I used for both encoders.

Figure 8. Encoding settings used for testing LiveEdge Max

Figure 9. Encoding settings used for testing OBS
Tables 2 and 3 show the results from my tests.

Table 2. Latency testing with RTMP ingest

Table 3. Latency testing with SRT ingest
Closing Thoughts
Overall, I was pleased with the ability to install and configure Oven MediaEngine, even though I had no previous experience using Docker. The help resources and video AirenSoft provided me were great, along with the company’s responses to my many questions along the way. I found myself very comfortable running commands in the commandline interface once Docker was up and running.
Additionally, I learned that ingesting RTMP and SRT live encodes to OvenMediaEngine using LiveEdge Max and OBS works great and is easy if you format the streams properly. Configuring streaming playback with OvenMedia Engine over WebRTC and LL-HLS was straightforward for me. It should also be easy enough for novices to do as well. Even with using a smaller free tier instance for testing, the la tency results for my tests were good and well within range of what’s expected.
Two items I wanted to test but didn’t have enough time for were creating my own custom application outside of using the default application called “app” and adding my own encoding ladder for transcoding incoming live streams. I didn’t understand how to configure these items either and probably needed a little more guid ance from AirenSoft. It might be nice to have a graphical user interface in the future to simplify more complex application setups for creating custom applications and allowing users to add encoding ladders for live transcoding.
Related Articles
This review will highlight the JW Player online video platform and explore its on-demand streaming, captioning, web player capabilities, and other features. It will walk viewers through using the platform, including the core features like uploading videos, importing streams, and creating playlists in the Media Library and configuring the media player, as well as more advanced features. It will also discuss testing done using the platform.
17 May 2024
With large sports-streaming operators, WebRTC provides a real opportunity for ultra-low-latency streaming. But those same operators, which spend billions on licensing rights, can't afford to just swap the ability to stream content in real time for basic OTT functionality like SSAI and DRM.
19 Jan 2024
This review will highlight the NETINT Quadra T1U and explore its capabilities as a video processing unit (VPU) for high-volume encoding and transcoding of single files, encoding ladders, and live streams.
05 Dec 2023
Rather than focusing on random tasks, this tutorial will walk you through the fundamentals of encoding for low latency HLS with FFmpeg, OBS, Mux Video, and THEOplayer
02 Mar 2022
Companies and Suppliers Mentioned